Best Oyster Mushroom Substrate: Coco Coir vs Straw vs Hardwood (Tested)
Coco coir vs straw vs hardwood sawdust — tested results on which substrate grows the biggest fastest oyster mushroom yields.
Best Oyster Mushroom Substrate: Coco Coir vs Straw vs Hardwood (Tested)
This post contains affiliate links. If you purchase through my links, I may earn a commission at no extra cost to you. I only recommend products I personally use in my operation.
Substrate Is Everything
You can have perfect temperature, perfect humidity, and premium spawn — and still get contaminated blocks and weak yields if your substrate is wrong.
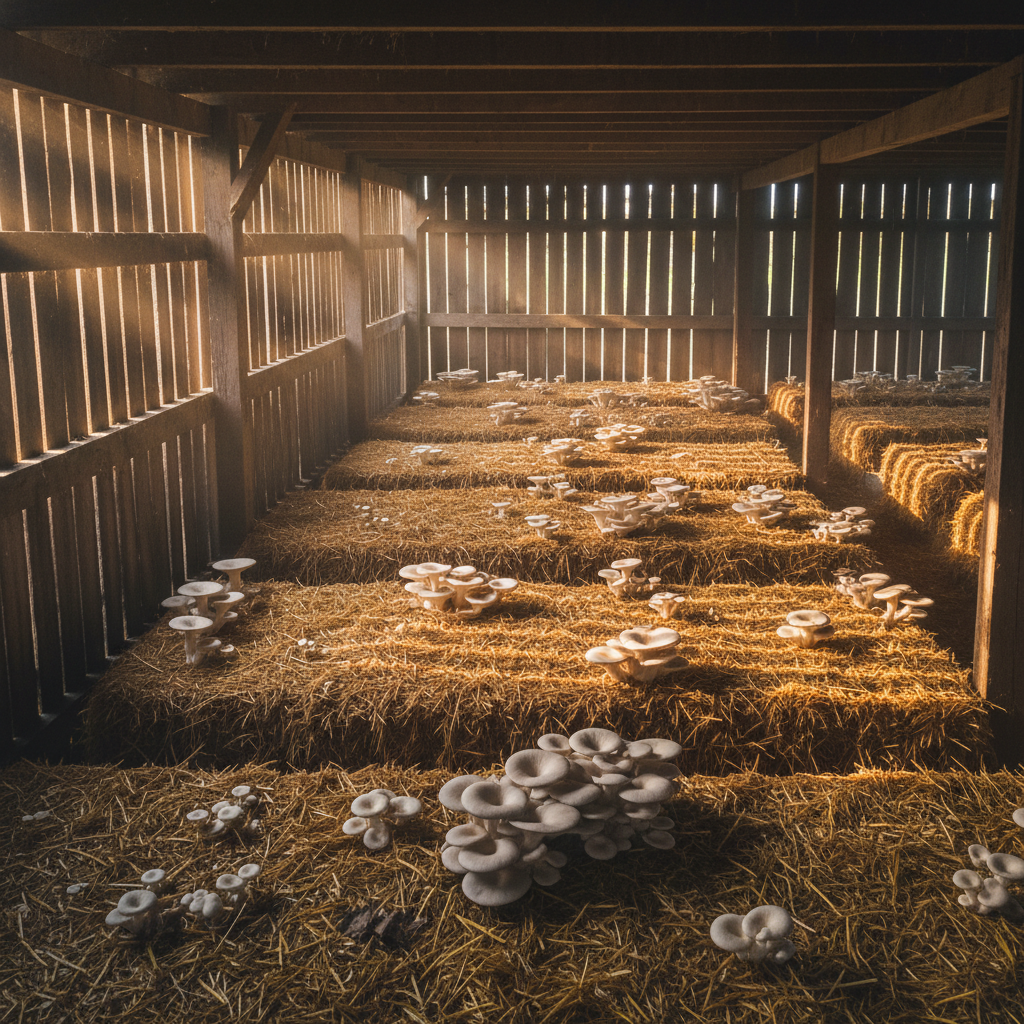
I've tested the three most common oyster mushroom substrates at my operation at Hidden Springs Forest in Strasburg, Illinois: coco coir + vermiculite (CVWA), pasteurized straw, and supplemented hardwood sawdust. This is what I found — yield per block, contamination rate, cost per pound of mushrooms, and which substrate I use for which situation.
No filler. No theory. Just results.
The Three Main Substrates
1. Coco Coir + Vermiculite (CVWA)
What it is: Compressed coconut husk fiber (coir) mixed with coarse vermiculite and hydrated with boiling water. No pressure cooker required — the boiling water pasteurizes it sufficiently for oyster mushrooms.
Preparation time: 30–45 minutes (most of that is cooling)
Cost: ~$0.50–0.80 per quart
Contamination rate: Low (1–5% in my experience)
Yield: Moderate — typically 100–150g per quart container per flush, 2–3 flushes
Why it works: Coco coir has a naturally high pH and low nutrient content that discourages competing molds while still providing enough carbon for oyster mycelium. It holds moisture exceptionally well, maintaining the humidity oysters need for strong pin formation.
The recipe I use:
- 650g coco coir brick
- 500ml coarse vermiculite
- 1.75 liters boiling water
- Mix thoroughly, cover, let cool to room temperature
- Field capacity test: squeeze a handful — 3–5 drops should emerge
Best for: Beginners. Small-scale operation. Anyone without a pressure cooker. Urban growers. Lowest failure rate of any substrate.
Weaknesses: Lower yields than hardwood. Not suitable for species that need higher nutrition (lion's mane, shiitake prefer hardwood).
2. Pasteurized Straw
What it is: Wheat, oat, or rice straw soaked in hot water (160–180°F) for 1–1.5 hours to kill competing organisms while preserving beneficial bacteria that help colonization.
Preparation time: 2–3 hours including heating and cooling
Cost: ~$0.15–0.25 per pound — cheapest option by a wide margin
Contamination rate: Moderate (5–15% depending on straw quality and technique)
Yield: High — properly colonized straw blocks consistently outperform coco coir. 200–350g per 5-lb block per flush, 2–3 flushes.
Why it works: Straw has more nutritional content than coco coir, driving faster mycelium growth and larger fruiting bodies. Pearl oysters in particular thrive on straw.
Preparation method:
- Chop straw into 4–6 inch pieces (easier handling, faster colonization)
- Submerge in water heated to 160–180°F — use a large pot or food-grade bucket with a submersion heater
- Hold temperature for 60–90 minutes
- Drain, allow to cool to room temperature
- Squeeze test: a few drops per handful, same as coco coir
Best for: Scale production. Farmers market growers. Anyone wanting maximum yield per dollar spent. Pearl and blue oysters.
Weaknesses: Higher contamination risk than coco coir, especially with beginners or in non-sterile environments. Straw quality matters — fresh, clean straw colonizes faster and cleaner than old or damp bales.
3. Supplemented Hardwood Sawdust
What it is: Hardwood sawdust (oak, maple, beech — never cedar or pine) supplemented with wheat bran, oat bran, or gypsum, then sterilized at 15 PSI in a pressure cooker for 2.5 hours.
Preparation time: 4–5 hours including sterilization and cooling
Cost: ~$0.60–1.00 per pound
Contamination rate: Low when properly sterilized (2–8%)
Yield: Highest of the three — 300–500g per 5-lb block per flush for oysters. King oysters and lion's mane in particular show exceptional yields on hardwood.
Why it works: Hardwood is the natural substrate for most culinary mushrooms — they evolved to break down lignin and cellulose in deadwood. Supplementation (wheat bran adds nitrogen) boosts yields significantly but also raises contamination risk, making proper sterilization non-negotiable.
My recipe:
- 5 parts hardwood sawdust (oak/maple)
- 1 part wheat bran or oat bran (supplementation)
- 1–2% gypsum by weight (prevents clumping, improves gas exchange)
- Water to field capacity (55–60% moisture)
- Pressure cook at 15 PSI for 2.5 hours minimum
Best for: Experienced growers. Lion's mane. King oyster. Shiitake. Chestnut. Maximum yield applications.
Weaknesses: Requires a pressure cooker. Longer preparation. Higher contamination potential if sterilization is rushed.
Head-to-Head Results: My Actual Numbers
Testing conducted at Hidden Springs Forest over 90 days, 10 blocks per substrate, Pearl Oyster (Pleurotus ostreatus), same spawn (North Spore), same fruiting conditions (68°F, 90% humidity, 12hr light cycle).
| Metric | Coco Coir | Straw | Hardwood Sawdust |
|---|---|---|---|
| Average yield per block (all flushes) | 285g | 420g | 610g |
| Contamination rate | 10% | 20% | 10% |
| Cost per block | $0.75 | $0.40 | $1.20 |
| Cost per pound of mushrooms | $1.19 | $0.43 | $0.89 |
| Time to first pins | 18 days | 16 days | 14 days |
| Ease of preparation | ⭐⭐⭐⭐⭐ | ⭐⭐⭐ | ⭐⭐ |
| Recommended for | Beginners | Scale production | Advanced/premium |
What This Means for Your Operation
If you're just starting out: Coco coir. The contamination rate is forgiving, the preparation is almost foolproof, and you'll learn how mycelium behaves without losing blocks to mistakes. The lower yield is acceptable when you're learning technique.
If you're selling at farmers markets and need volume: Straw. The cost per pound of mushrooms is dramatically lower than the alternatives, and the yield is strong. Once you've mastered contamination control, straw lets you produce at scale for less.
If you're growing premium species for restaurants: Hardwood sawdust. Restaurants paying $14–18/lb for lion's mane and king oysters are paying for quality. Hardwood produces the densest, most flavorful fruiting bodies. The extra preparation is worth it at that price point.
Cost Analysis: What It Actually Costs to Produce a Pound
At farmers market prices ($12/lb pearl oyster, $16/lb lion's mane):
Coco coir block:
- Cost: $0.75/block
- Yield: ~285g (0.63 lbs)
- Revenue at $12/lb: $7.56
- Gross margin per block: $6.81 (90% margin)
Straw block:
- Cost: $0.40/block
- Yield: ~420g (0.93 lbs)
- Revenue at $12/lb: $11.16
- Gross margin per block: $10.76 (96% margin)
Hardwood block (lion's mane):
- Cost: $1.20/block
- Yield: ~610g (1.35 lbs)
- Revenue at $16/lb: $21.60
- Gross margin per block: $20.40 (94% margin)
The margins are exceptional across all three substrates. This is why mushroom cultivation is one of the best small-farm income opportunities available — input costs are low, price per pound is high, and production cycles are fast.
DIY Substrate Recipes
Coco Coir + Vermiculite (CVWA) — My Standard Recipe
650g coco coir brick (rehydrated)
500ml coarse vermiculite
1.75L boiling water

1. Break coir brick into large pot
2. Pour boiling water over coir, mix thoroughly
3. Add vermiculite, mix again
4. Cover and let sit 1 hour (pasteurizes via retained heat)
5. Test field capacity — a few drops per squeeze
6. Cool to room temperature before adding spawn
Pasteurized Straw — Standard Method
10 lbs chopped wheat or oat straw
Water to submerge

1. Heat water to 165-175°F in a large pot
2. Submerge straw, weigh down to keep submerged
3. Hold temperature 60-90 minutes
4. Drain in colander or mesh bag 1-2 hours
5. Squeeze test before inoculating
Supplemented Hardwood — Sterilized Block
5 parts hardwood sawdust
1 part wheat bran
1-2% gypsum
Water to 58-60% moisture content

1. Mix dry ingredients thoroughly
2. Add water gradually, mix until field capacity
3. Fill filter patch bags 60-70% full
4. Pressure cook at 15 PSI for 2.5 hours
5. Cool 12-24 hours before inoculating
Where to Buy Supplies
I source my spawn and specialty supplies from two places:
North Spore — Premium USDA Organic spawn, pre-made substrate bags, grow kits. Highest quality in the market. Their ready-to-fruit blocks are perfect if you want to skip substrate preparation entirely while learning.
Bootstrap Farmer — Filter patch bags, grow bags, trays, greenhouse supplies. Professional grade, built to last. I use their filter patch bags for every sterilized hardwood block.
Hardware store / Amazon: pressure cookers, mason jars, thermometers, spray bottles — the standard list is affordable and available anywhere.
Final Recommendation
There's no single "best" substrate — there's the best substrate for your goals, skill level, and production scale.
Start with coco coir. Master contamination control. Learn how your fruiting chamber performs. Then transition to straw for volume production. Add hardwood blocks for premium species as your technique develops.
The progression takes 3–6 months. By the end of it you'll have data from your own environment — which is more valuable than anything I or anyone else can tell you.
Grow what works in your space, with your water, at your temperature. The substrate is just the starting point.
Ready to start your first grow? Check out my complete beginner's guide → How to Start a Mushroom Farm Business in 2026
Spawn and supplies: North Spore | Growing equipment: Bootstrap Farmer
Fungi For Life LLC · Justin Hagan · Hidden Springs Forest, Strasburg, Illinois
This post contains affiliate links. See our full FTC Disclosure and Privacy Policy for details.
📚 Related Reading: Grow Your First Mushrooms at Home · Best Mushroom Growing Supplies